Creating SNMP Plug-In for Enterprise Manager Cloud Control

Putting it In my previous blog (Enterprise Manager Cloud Control, SNMP, and Plug-Ins –
The Background), I shared my frustration in trying to create
a plug-in in OEM. Here are the technical steps for a very simple plug-in.
Preparing Plug-in
To build your own plug-in, you need to download a development kit:- To download EDK using UI, from the Setup menu, selectExtensibility, and then select Development Kit.OR
To download EDK using EMCLI, run the following steps: - Log in to OEM:
$ /oracle/em/middleware/bin/emcli login -username=sysmanEnter password :
Login successful
- Download the EDK zip archive:
$ emcli get_ext_dev_kitDownloading edk.zipFile saved as edk.zipFile(s) downloaded successfully
system. For example:
$unzip 13.3.0.0.0_edk_partner.zip
Most of them can be found at the following link: About Plug-in Metadata
Restrictions and Guidelines
- Each plug-in must be assigned a version. The plug-in versioning syntax is as follows: a.b.c.d.e, where:
- a.b = The version of the Enterprise Manager Extensibility Development Kit (EDK) used for development (13.1, 13.2, and so on)
- c = The developer-assigned plug-in version; this value must be incremented with each plug-in release on the same Enterprise Manager Cloud Control release
- d = Indicates whether the plug-in is a beta version or a production version; the value 0 indicates beta and 1 or later indicates production
- e = For future use; the default value is 0
- Each time you deploy a new plug-in version, you must increase the version number.
I created a script using the sed command to increase the number: - Plug-ins are identified by a unique plug-in identifier (ID). The plug-in ID has three parts:
- Vendor ID (8 characters). For example: test
- Product ID (8 characters). For example: switch
- Plug-in Tag (4 characters). For example: xkey.
- The content in the following files should be identical with each other:
- Putting it all together, the following example shows the first version of a plug-in created for Enterprise Manager Cloud Control 13c: 13.1.1.1.0
sed -i "s/13.3.0.${PREV_VER}.0/13.3.0.${CURR_VER}.0/g" plugin.xml agent/plugin_registry.xml
find ${STAGE_DIR} -type f -name "*xml"|xargs grep -l META_VER | xargs sed -i "s/META_VER=\"13.${PREV_VER}/META_VER=\"13.${CURR_VER}/g"
- agent/default_collection/test_switch_xkey.xml oms/metadata/default_collection/test_switch_xkey.xml
- agent/metadata/test_switch_xkey.xml
oms/metadata/test_switch_xkey.xml
oms/metadata/targetType/test_switch_xkey.xml
Folder Structure
The structure of the folders and files should be like this:
├── agent
│ ├── default_collection
│ │ └── test_switch_xkey.xml
│ ├── metadata
│ │ └── test_switch_xkey.xml
│ └── plugin_registry.xml
├── discovery
│ ├── test_switch_xkey_snmp_discovery.pl
│ └── test_switch_xkey_snmp_discovery.xml
├── oms
│ └── metadata
│ ├── test_switch_xkey.xml
│ ├── default_collection
│ │ └── test_switch_xkey.xml
│ ├── discovery
│ └── targetType
│ └── test_switch_xkey.xml
└── plugin.xml
Metadata File
A basic plug-in requires metadata for the plug-in itself, including information such as the name and version that is used by Oracle Management Service and Management Agents, definition of a metric indicating whether the monitored target is up, and definition of the frequency at which metric data should be collected. Metadata file example:<?xml version="1.0"?>
<TargetMetadata META_VER="13.73" TYPE="test_switch_xkey">
<Display>
<Label NLSID="hs_displayname">SNMP Plugin</Label>
</Display>
<Metric NAME="SnmpTrap" TYPE="TABLE">
<Display>
<Label NLSID="MY_threshold">Snmp Trap</Label>
</Display>
<CategoryValue CLASS="Default" CATEGORY_NAME="Fault"/>
<TableDescriptor>
<ColumnDescriptor NAME="TimeOfEvent" TYPE="STRING" IS_KEY="TRUE">
<Display>
<Label NLSID="timeOfEvent_1">Name</Label>
<Description NLSID="timeOfEvent">Time Of Event</Description>
<Unit NLSID="EM_SYS_STANDARD_NA_NA">NA</Unit>
<UnitCategory>NA</UnitCategory>
</Display>
</ColumnDescriptor>
<ColumnDescriptor NAME="EventDetails" TYPE="STRING" IS_KEY="FALSE">
<Display>
<Label NLSID="eventDetails_1">EventDetails</Label>
<Description NLSID="eventDetails">Trap Event Details</Description>
<Unit NLSID="EM_SYS_STANDARD_NA_NA">NA</Unit>
<UnitCategory>NA</UnitCategory>
</Display>
</ColumnDescriptor>
</TableDescriptor>
<PushDescriptor RECVLET_ID="SNMPTrap">
<Property NAME="MatchTrapOID" SCOPE="GLOBAL">1.3.6.1.4.1.29284.1.1.5.3</Property>
<Property NAME="MatchAgentAddr" SCOPE="INSTANCE">ipaddress</Property>
<Property NAME="KeyTimeOfEventOID" SCOPE="GLOBAL">1.3.6.1.4.1.29284.1.1.1.11.0</Property>
<Property NAME="ContextTimeOfEventOID" SCOPE="GLOBAL">1.3.6.1.4.1.29284.1.1.1.11.0</Property>
<Property NAME="DataEventDetailsOID" SCOPE="GLOBAL">1.3.6.1.4.1.29284.1.1.1.13.0</Property>
<Property NAME="ContextStatusOID" SCOPE="GLOBAL">1.3.6.1.4.1.29284.1.1.1.3.0</Property>
<Property NAME="SeverityCodeOID" SCOPE="GLOBAL">1.3.6.1.4.1.29284.1.1.1.3.0;0=CLEAR,4=WARNING,5=CRITICAL,6=CRITICAL</Property>
<CredentialRef NAME="monCreds">monCredentials</CredentialRef>
</PushDescriptor>
</Metric>
<CredentialInfo>
<CredentialSet NAME="monCredentials" USAGE="MONITORING">
<Display>
<Label NLSID="hs_monCredentials">Credentials</Label>
</Display>
<AllowedCredType TYPE="SNMPV1Creds" />
</CredentialSet>
</CredentialInfo>
<InstanceProperties>
<InstanceProperty NAME="ipaddress" CREDENTIAL="FALSE" OPTIONAL="TRUE">
<Display>
<Label NLSID="hs_ipaddress">Sender’s IP Address</Label>
</Display>
</InstanceProperty>
</InstanceProperties>
</TargetMetadata>
A few points:
- A key column will be updated when there is a new trap with the same key.
- MatchAgentAddr is dynamic. That is, it is not hard coded. When you deploy the plug-in, you can enter the sender IP address.
- The credential (community) is also dynamic and can be set when deploying the plug-in.
- If all of your traps have a default trap ID and you have the same fields in all of your traps, you can have only one PushDescriptor. Otherwise, you will need to define for each of the traps an XML section of PushDescriptor.
- A severity level that is set to CLEAR the alert is recommended.
Default Collection
- The default collection metadata file for a target type defines the following:
- The metric data (including configuration collection metric data) to be collected from targets and written to the Management Repository.
- The frequency at which this metric data is collected.
- Thresholds that, when exceeded, will cause a Metric Alert event to be raised.
- An optional message to display when a threshold is exceeded
<?xml version="1.0"?>Note that the value of the
<TargetCollection TYPE="test_switch_xkey" META_VER="13.73">
<CollectionItem NAME="SnmpTrap">
<MetricColl NAME="SnmpTrap">
<Condition PUSH="TRUE"
COLUMN_NAME="EventDetails"
CRITICAL="NONE" OPERATOR="NE"
MESSAGE="SNMP Trap - The value for %columnName% is %value%%%. - Alert"
CLEAR_MESSAGE="SNMP Trap - The value for %columnName% is %value%%%. - Cleared"
MESSAGE_NLSID="snmp_trap_alert" />
</MetricColl>
</CollectionItem>
</TargetCollection>
TYPE attribute and theMETA_VER attribute in the default collection metadata file must match the TYPE and the META_VER values defined in the target type metadata file to create an association between them.Plug-in Deployment
Creating the plug-in is done via several commands. Importing and deploying the plug-in can be done via the command line or by web interface. It is handy and easy to use a script to deploy automatically - this is the way I chose.Set Your Environment
I used the Java from OMS database home:
$ export JAVA_HOME=/oracle/product/12.2.0.1/dbhome_1/jdk $ export PATH=/oracle/product/12.2.0.1/dbhome_1/jdk/bin:$PATH
Validate that the plug-in files are valid:
$ /oracle/em/middleware/sysman/edk/bin/empdk validate_plugin -stage_dir /home/oracle/stage -format text -tmp_dir /tmp -out_dir /tmp
Create the plug-in:
/oracle/em/middleware/sysman/edk/bin/empdk create_plugin -stage_dir /home/oracle/stage -conn_desc <oms_database>:<oms_database port>:<oms_service_name> -repos_user sysman -out_dir /tmp
Import the plug-in to OEM:
/oracle/em/middleware/bin/emcli import_update -file=/tmp/13.3.0.73.0_test.switch.xkey_2000_0.opar -omslocal
Deploy the plug-in to the OMS:
/oracle/em/middleware/bin/emcli deploy_plugin_on_server -plugin=test.switch.xkey:13.3.0.73.0 -sys_password=<change_on_install>
Verify the deployment progress of the plug-in:
$ /oracle/em/middleware/bin/emcli get_plugin_deployment_status -plugin=test.switch.xkey
Deploy the plug-in to the agent:
/oracle/em/middleware/bin/emcli deploy_plugin_on_agent -agent_names=" <monitoring server>:3872" -plugin="test.switch.xkey"
Verify the deployment progress of the plug-in:
$ /oracle/em/middleware/bin/emcli get_plugin_deployment_status -plugin=test.switch.xkey
Plug-in Undeployment
Undeploy plug-in from the agent:
$ /oracle/em/middleware/bin/emcli undeploy_plugin_from_agent -plugin="test.switch.xkey:13.3.0.73.0" -agent_names="<monitoring server>:3872" -delete_targets
Verify the Undeployment progress of the plug-in:
$ /oracle/em/middleware/bin/emcli get_plugin_deployment_status -plugin=test.switch.xkey
Undeploy the plug-in from the OMS:
$ /oracle/em/middleware/bin/emcli undeploy_plugin_from_server -plugin="test.switch.xkey:13.3.0.73.0" -sys_password=<change_on_install>
Verify the UNdeployment progress of the OMS
$ /oracle/em/middleware/bin/emcli get_plugin_deployment_status -plugin=test.switch.xkey
Adding Targets
The last step in plug-in deployment is to add a target. To add a target on a managed host by specifying the target monitoring properties, follow these steps:- From the Setup menu, select Add Target , then select Add Targets Manually. Cloud Control displays the Add Targets Manually page.
- On the Add Targets Manually page, select Add Targets Declaratively by Specifying Target Monitoring Properties.
- Add Target Name
- Community is usually: public
- Enter the IP address of the sender

Testing and Debugging
- Send SNMP trap to the agent
- Check if the agent received the trap, and filter the matching metric.
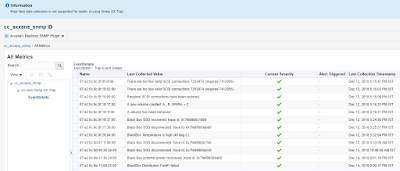
$ tailf -100 /oracle/em/agent/agent_inst/sysman/log/gcagent_sdk.trcSample output in the web interface:
2018-12-14 21:01:36,449 [151:F60C8AF1] INFO - =====SNMPRecvlt received V2 notification=====:
2018-12-14 21:01:36,449 [151:F60C8AF1] INFO - SNMPV2 notification from host 10.14.1.50
2018-12-14 21:01:36,449 [151:F60C8AF1] INFO - Notification Details:
2018-12-14 21:01:36,449 [151:F60C8AF1] INFO - CommandResponderEvent[securityModel=2, securityLevel=1, maxSizeResponsePDU=65535, pduHandle=PduHandle[0], stateReference=StateReference[msgID=0,pduHandle=PduHandle[0],securityEngineID=null,securityModel=null,securityName=public,securityLevel=1,contextEngineID=null,contextName=null,retryMsgIDs=null], pdu=TRAP[requestID=0, errorStatus=Success(0), errorIndex=0, VBS[1.3.6.1.2.1.1.3.0 = 1:02:47.22; 1.3.6.1.6.3.1.1.4.1.0 = 1.3.6.1.4.1.29284.1.1.2.1.47; 1.3.6.1.4.1.29284.1.1.1.11.0 = 07:e2:0c:0e:12:3b:24:00; 1.3.6.1.4.1.29284.1.1.1.18.0 = Axxana; 1.3.6.1.4.1.29284.1.1.1.19.0 = env14; 1.3.6.1.4.1.29284.1.1.1.20.0 = collector; 1.3.6.1.4.1.29284.1.1.1.13.0 = Black Box external power recovered. trace id: 0x7fe898004a00; 1.3.6.1.4.1.29284.1.1.1.4.0 = 5; 1.3.6.1.4.1.29284.1.1.1.3.0 = 3; 1.3.6.1.4.1.29284.1.1.1.12.0 = 10.14.1.50]], messageProcessingModel=1, securityName=public, processed=false, peerAddress=10.14.1.50/36940, transportMapping=org.snmp4j.transport.DefaultUdpTransportMapping@71d78ff, tmStateReference=null]AF1] INFO - oid 3: 1.3.6.1.4.1.29284.1.1.1.18.0 val : Axxana
2018-12-14 21:01:36,450 [151:F60C8AF1] INFO - oid 4: 1.3.6.1.4.1.29284.1.1.1.19.0 val : env14
2018-12-14 21:01:36,450 [151:F60C8AF1] INFO - oid 5: 1.3.6.1.4.1.29284.1.1.1.20.0 val : collector
2018-12-14 21:01:36,450 [151:F60C8AF1] INFO - oid 6: 1.3.6.1.4.1.29284.1.1.1.13.0 val : Black Box external power recovered. trace id: 0x7fe898004a00
2018-12-14 21:01:36,450 [151:F60C8AF1] INFO - oid 7: 1.3.6.1.4.1.29284.1.1.1.4.0 val : 5
2018-12-14 21:01:36,450 [151:F60C8AF1] INFO - oid 8: 1.3.6.1.4.1.29284.1.1.1.3.0 val : 3
2018-12-14 21:01:36,450 [151:F60C8AF1] INFO - oid 9: 1.3.6.1.4.1.29284.1.1.1.12.0 val : 10.14.1.50
2018-12-14 21:01:36,451 [151:F60C8AF1] INFO - Matching metric found ...
metric name : SnmpTrap MatchTrapOID: 1.3.6.1.4.1.29284.1.1.2.1.47 MatchAgentAddress : 10.14.1.50
2018-12-14 21:01:36,451 [151:F60C8AF1] INFO - Trap received is for sending Data
2018-12-14 21:01:36,451 [151:F60C8AF1] INFO - Sending datapoint for metric , test_switch_xkey.cc_snmp,SnmpTrap
References
Enterprise Manager Cloud Control Extensibility Programmer's Referencehttps://docs.oracle.com/cd/E73210_01/EMPRF/title.htm
Defining the Plug-in
https://docs.oracle.com/cd/E73210_01/EMPRF/GUID-B80B66E6-D07B-4890-A4CE-A7ECF7874946.htm#EMPRF11232
Creating Target Metadata Files
https://docs.oracle.com/cd/E73210_01/EMPRF/GUID-C6918D3A-B696-4EAC-8C8F-0DCD17773346.htm#EMPRF11253
Plug-in Builder
https://docs.oracle.com/cd/E73210_01/EMPRF/GUID-6A94EE77-D7AA-4A30-83AA-B627C41D7264.htm#EMPRF12910
Using Receivelets
https://docs.oracle.com/cd/E73210_01/EMPRF/GUID-39F8E13B-387A-4DA2-A3BD-DEB2BF339683.htm#EMPRF12663
Enterprise Manager Troubleshooting Guide for Third-Party Database Plug-ins
https://docs.oracle.com/cd/E26854_01/em.121/e35212/ch1_common_issues.htm#EMPTG106
Comments
Post a Comment